






You can tackle cracked and rough heels at home with a simple evening ritual: a softening bath, gentle filing, and a generous layer of balm under cotton socks overnight. We'll guide you on how to do it correctly and how often to repeat it.
Why Heels Harden – Common Causes of Rough Skin
Hardened heels are not a sign of neglected care, but rather a logical reaction of the skin to what we demand from it every day. The foot bears your entire weight, repeatedly pressing against the ground as you walk, and the skin defends itself against this pressure in the only way it knows how – by thickening its outer horny layer. This is technically known as hyperkeratosis, commonly referred to as callusing. In itself, it's not a flaw, but more of a protective mechanism. The problem begins when the thickened layer loses elasticity and moisture, and instead of cushioning impact, it starts to crack.
The skin on the feet has one major disadvantage. Unlike most of the body, it practically lacks sebaceous glands, so it doesn't have its own fatty film to retain moisture. It relies solely on what you provide from the outside, and it dries out significantly faster than the skin on your arms or abdomen. This is also why heel hydration needs to be repeated regularly and why a one-time treatment before a holiday is usually not enough.
Several factors typically contribute to roughening simultaneously:
- Pressure and Friction – shoes without firm heel support, hard soles, prolonged standing, or daily walking on hard surfaces.
- Open Footwear – in flip-flops and sandals, the heel lacks back support, slightly shifting with each step, and its edge rubs against the strap or the edge of the sole.
- Dry Air – air conditioning in summer and heating in winter deprive the skin of moisture just as effectively, only in different seasons.
- Walking Barefoot – at home, in the garden, on the beach, and by the pool; chlorinated and salty water further accelerate drying.
- Irregular Care – without hydration and gentle removal of dead cells, the layer gradually builds up.
- Age and Individual Dispositions – as years go by, skin renewal slows down, and an overall dry skin type also shows on the feet.
The combination of the last two points with summer footwear explains a phenomenon that surprises many: heels often become rough precisely in the warm months. Intuitively, we would expect the opposite because feet are not hidden in winter shoes. However, open footwear leaves the heel edge unprotected, exposing the skin to air, dust, and sun, causing it to lose moisture more quickly. The thickened edge then bends over the hard surface when walking, creating fine cracks on its surface.
Most of this rough skin can be managed with home care. You'll recognize it by the heel feeling rough to the touch, possibly yellowish or grayish, but it doesn't hurt, bleed, or have red surroundings. Such a condition responds to softening, gentle filing, and regular moisturizing, precisely the process we will go through further in the article.
A different situation involves deep, painful cracks extending below the surface, wounds that bleed or heal very slowly, significant redness, swelling, warm skin in the area, and any discharge. This also includes suspicion of fungal infection or warts and hardened skin that returns even with diligent care. In these cases, a home ritual is not enough – consult a podiatrist or doctor. People with diabetes, circulation disorders in the lower limbs, or reduced foot sensitivity should be particularly cautious; their heel care should be guided by a professional, and home filing is not recommended without consultation.
If your heels fall into the first group, we have good news. The entire evening routine described in the article takes about twenty minutes and fits into a regular evening in front of the TV. You don't need a professional grinder or sharp tool intervention; warm water, a softening product, a file, and a nourishing balm from regular body cosmetics will suffice. The rest is all about consistency.
Preparation: Tools and Products to Have Ready
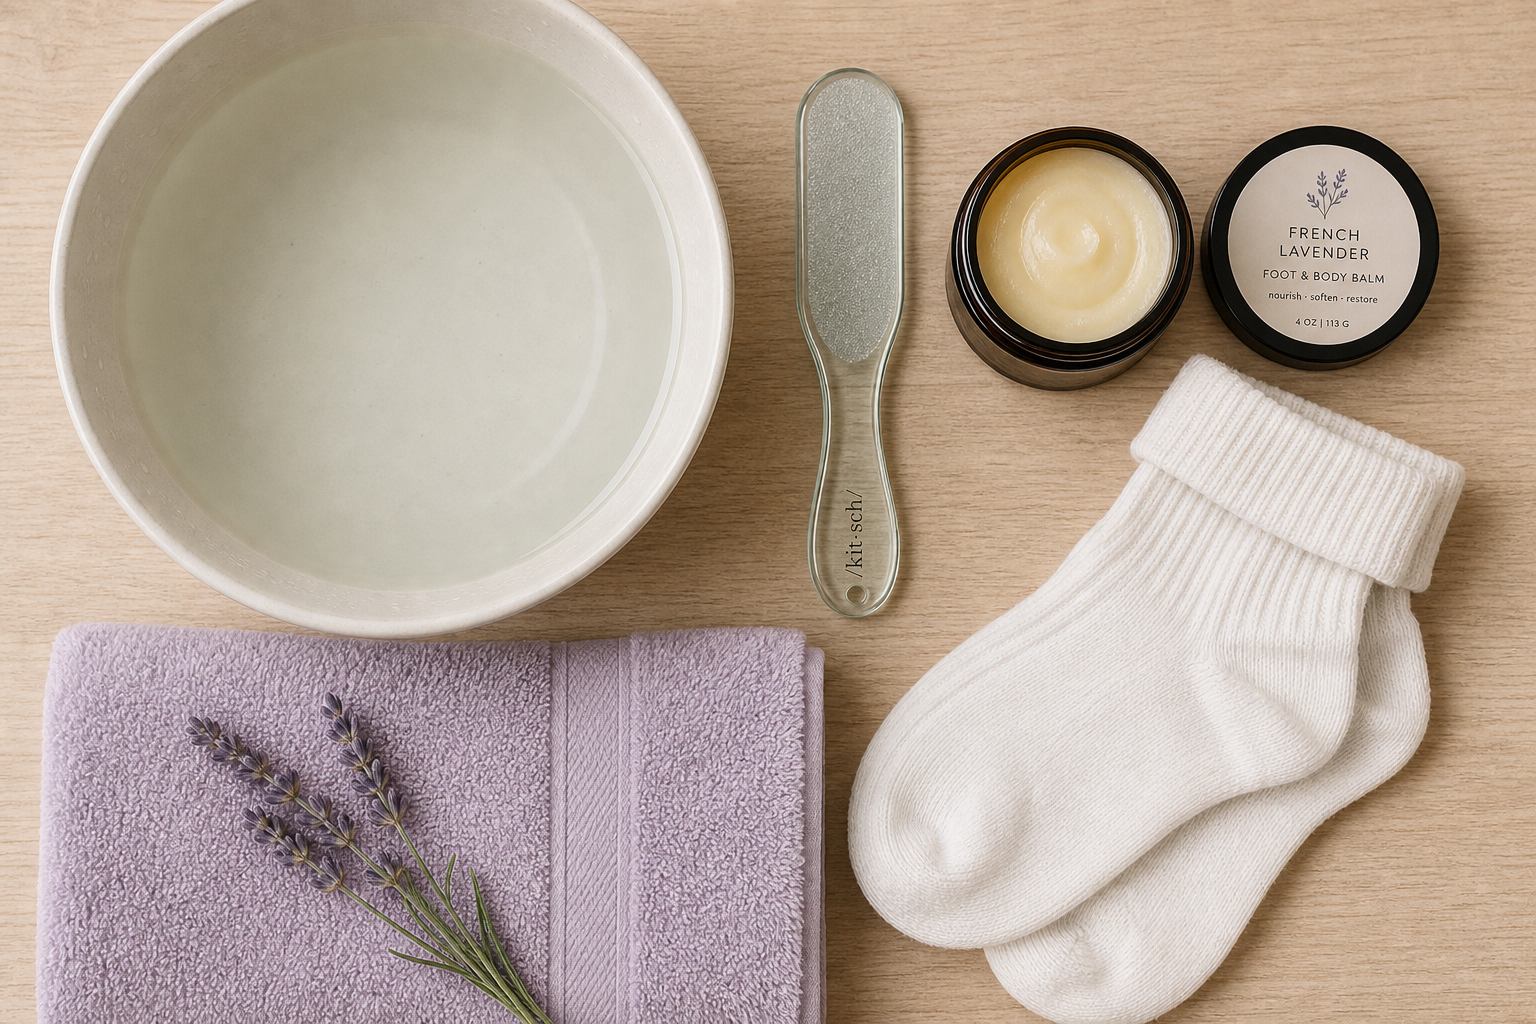
Evening foot care has a practical peculiarity: once you soak your feet, you won't want to go anywhere. It's worth preparing everything in advance and having it within reach. The list is short, most items can be found at home, and the only item worth investing in is a file – with proper care, it will last for years.
What to have within reach:
- A basin, bucket, or tub. You need a container that comfortably fits both feet and ankles. A lower basin placed in front of a chair is more practical for an evening ritual than a tub – you can keep your feet in it for twenty minutes without having to bend over.
- A gentle cleansing product for dry skin. Foot care is better suited to shower oils and oil-based cleansing gels rather than traditional foaming soap. Regular soaps have a higher pH and stronger surfactants, which can strip the skin of oils – for heels, which are naturally dry and lack sebaceous glands, this is counterproductive. Oil-based cleansers leave a thin film on the skin and don't dry it out. In practice, these are products like Bioderma Atoderm Huile de Douche or ranges designed for atopic and very dry skin; a large liter bottle is more economical for a home ritual than a small bottle.
- A foot file or pumice stone. Glass and metal files are more durable than cheap plastic graters with glued-on sandpaper – the abrasive surface doesn't peel off, they can be rinsed and disinfected, and they don't crumble in water. Natural pumice is a gentle option for regular maintenance, but it's porous, so let it dry thoroughly after use. Whatever you choose, it's worth having two grits: a coarser one for filing and a finer one for finishing.
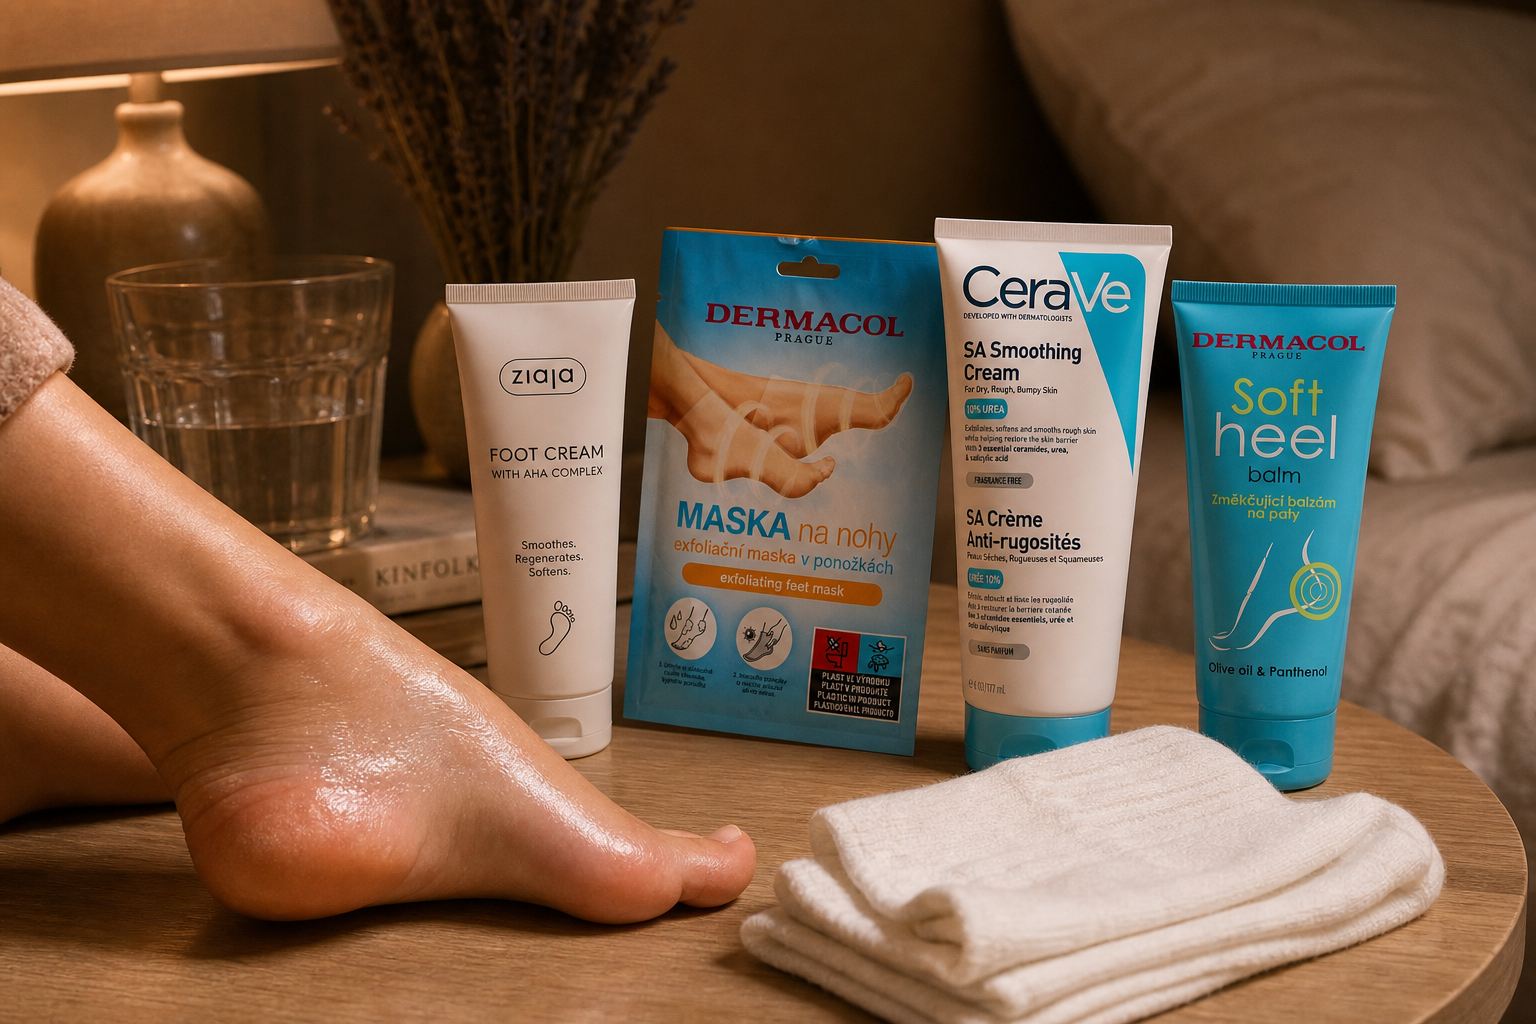
- A thick body balm or foot cream. Thin body lotion isn't enough for heels. Look for a thick consistency and formulation targeted at dry skin – commonly containing urea, lactic acid, glycerin, or shea butter. Balms for dry and atopic skin from brands like Bioderma, La Roche-Posay, Uriage, or CeraVe are suitable for feet even if they're not specifically labeled "for heels."
- Clean cotton socks. Ideally looser, with a soft cuff that doesn't constrict the ankle. Cotton keeps the balm in place and allows the foot to breathe better than plastic or nylon covers.
- A towel and something for the filed skin. A towel designated just for feet and a paper towel or bowl on hand – this will save you from cleaning the bathroom later.
What to Avoid
The first candidate for elimination is razor blades for heels. They remove skin quickly, but it's hard to gauge when to stop: you can easily reach live tissue, and cuts on the foot heal poorly because you walk on them all day. Similarly, it's unnecessary to buy the coarsest grater available in hopes it will work faster – the rough layer can be removed gently, just gradually.
Avoid products that dry out the skin: disinfectant gels, heavily scented soaps, or homemade "recipes" with vinegar in unmeasured concentrations. And if you have diabetes, foot sensitivity issues, cracked heels with wounds, or suspect a fungal infection, consult a doctor or podiatrist first – a home ritual doesn't replace professional care in such cases.
Soothing Bath as the Foundation of the Entire Process
Calloused skin on the heels is hard and unyielding when dry. If you start filing it straight away, it's difficult to gauge how much you've removed – the surface crumbles unevenly and you can easily go deeper than intended. A short foot bath is not just a pleasant start to the evening, but a technical step in the entire ritual: water binds moisture to the outer layer of skin, softening the hardened areas, making further treatment significantly gentler.
The key parameter is temperature. The water should be comfortably warm, roughly at body temperature – so that you can immerse your feet comfortably without having to gradually get used to it. While a hot bath seems like a quicker route to soft heels, it actually washes away the oils that retain moisture in the skin. After drying, the feet can feel tight and red, and the ritual starts with a step back.
The proven range is ten to fifteen minutes. This is the time it takes for the upper layer of skin to absorb enough water to soften, but not yet undergo changes that would complicate further work. Longer soaking won't improve the result: the skin swells and wrinkles, making it harder to discern the actual contour of the heel and easier to remove even healthy layers. Prolonged contact with water and cleansing products also weakens the skin barrier – the thin layer of oils that protects the skin from drying and irritation. For very dry or cracked skin, it's better to stay at the lower end of the range.
What you enrich the water with also plays a role. Traditional soap has a higher pH than the skin and degreases more than is desirable for dry heels. A shower oil, cleansing cream, or gentle shower gel with an oil component does a better job – products that remove impurities but also leave some lipids in the skin. A small amount in the water or applied on a sponge is enough, you don't need to create a thick foam. If your skin tends to be irritated or atopic, opt for a fragrance-free version; in body cosmetics, this is a commonly available choice today.
You can, of course, make the bath more pleasant. A handful of bath salt makes the water feel nicer and leaves the feet feeling fresh, just don't overdo it – a strongly salty solution tends to dry out the skin. Similarly, be cautious with fragrant additives and essential oils: they are pleasant on healthy skin, but don't use them on deep cracks, as irritation can occur easily. When trying a new product, test it first on a small area. The fragrance component is a bonus, not an active ingredient – the softening is done by water and time.
After removing from the water, don't rub your feet, but gently dry them by pressing a towel. Pay special attention to the space between the toes – residual moisture can linger there for a long time, creating an environment where the skin macerates and gets easily irritated. Go through each gap between the toes individually, ideally with the corner of a towel. The heels, on the other hand, don't need to be bone dry; it's enough that there's no free water left on them.
And one more practical note: softened skin is best worked on shortly after the bath, within the first few minutes. So before you take your feet out of the water, have everything you need at hand, so you don't have to search for anything with wet feet.
Summary of parameters worth remembering:
- Temperature: comfortably warm water, definitely not hot.
- Time: ten to fifteen minutes, shorter for dry and cracked skin.
- Cleansing product: shower oil or cleansing cream instead of traditional soap.
- Additives: salt and fragrance only in small amounts, not on cracked skin.
- After the bath: gentle drying by pressing a towel, including the space between the toes.
Gentle Filing Step by Step
Filing is the most delicate part of the entire evening ritual. It's here that the decision is made whether your heels will be smooth in a few days or irritated instead. The correct technique isn't complicated: just follow a few rules and resist the urge to accomplish everything in one evening.
Work on Slightly Dried Skin
Softened skin is significantly easier to work with, so start filing shortly after a bath. First, pat your feet with a towel until they're damp, not wet. Completely wet skin tears into small shreds under the file, and it's hard to gauge how much you've removed. A perfectly dry heel, on the other hand, offers resistance and tempts you to apply pressure, which leads nowhere.
If your file has a coarse and a fine side, start with the coarse side only on the thickest areas, typically on the outer edge of the heel and under the ball of the big toe. Finish the rest of the surface with the fine side. Metal graters with blades don't belong in a home ritual: the risk of cutting is unnecessarily high, and a cut on the heel takes a long time to heal.
Make Strokes Across the Entire Surface
The most common mistake is rubbing one spot. Although the rough layer may disappear quickly at first glance, a depression with a sharp transition into the surrounding skin forms underneath. This transition is strained when walking and thickens again within a few weeks, often more than the original callus.
Proceed with calm, long strokes in one direction across the entire heel surface, from the inner edge to the outer. Guide the file with its flat part and let its surface do the work, not the strength of your arm. After a few strokes, feel the heel with your fingers: you're looking for a smooth transition without edges, not a perfectly smooth white spot. Treat the edges and sides only lightly, as the skin is thinner there.
Better to Remove Less, but Regularly
The hardened layer serves a protective function, so the goal isn't to remove it entirely. If you remove too much, the body quickly assesses the lack of protection and a new layer grows stronger. That's why patience pays off with heels: short filing once a week yields better long-term results than one strenuous half-hour session once a month.
Stick to a rough limit of about two to three minutes per heel. If rough spots remain, leave them and return to them after the next softening. The difference is usually noticeable only after the third or fourth repetition.
Chemical Exfoliation as a Supplement or Alternative
A mechanical file isn't the only way. Creams with urea or salicylic acid help gradually release the bonds between hardened cells, so the top layer peels off on its own, and you don't have to remove anything by force. They're especially useful when the skin is sensitive or when you just want to maintain the filing results.
Among the available options is CeraVe SA Smoothing Cream, which combines salicylic acid with ceramides and moisturizing components. Products with urea work similarly, differing mainly in concentration. In both cases, they are applied to dry skin, results appear within days, and it's pointless to combine them with intensive filing the same evening.
When to Stop Filing
There are signals that indicate you should stop immediately, regardless of how rough the heels still are:
- redness or warmth in the treated area,
- burning, stinging, or tingling,
- sensitivity when stepping or a feeling of abrasion,
- a moist, shiny surface after removing a layer,
- any crack from which blood appears.
In such cases, rinse the heel, gently dry it, and treat it with a moisturizer without acids. Postpone further filing for at least a week. If the cracks are deep, repeatedly inflamed, or if you are being treated for diabetes or poor circulation in the lower limbs, heel care should be in the hands of a podiatrist or doctor, not a home ritual.
Balm, Night Socks, and How Often to Repeat the Ritual
The most crucial step comes when your heels are freshly filed and the skin is still supple after a bath. This is when it absorbs rich care the best – the softened surface is more permeable, and the balm spreads more evenly. If you let your feet air dry for an hour and only return to them before bed, part of the effect is lost. Ideally, apply the balm within a few minutes after drying, before the skin completely tightens.
Don't skimp on the amount. Apply a significantly thicker layer on the heels than on the rest of the feet – enough so that the product doesn't absorb immediately and remains as a visible film on the surface for a while. Massage it in circular motions over the entire heel, including the sides and edges where the skin cracks most often. Conversely, keep the spaces between the toes dry, as moisture and greasiness are not beneficial there.
Texture matters. A light body lotion is suitable for daily hydration of the entire body, but it's too weak for rough heels. Look for thick balms and ointments designed for very dry skin – you'll recognize them by their dense, almost non-melting consistency and ingredients like urea, panthenol, or plant butters. In the body care category, rich body balms like La Roche-Posay Lipikar Baume AP+ M or Bioderma Atoderm PP Baume are often chosen for this purpose; both are formulated for dry and sensitive skin, and a small amount is enough for heels as they spread widely.
Cotton socks are what hold the entire ritual together. They work on the principle of occlusion: they seal the balm between the fabric and the skin, preventing evaporation and rubbing off onto bed linens, while also retaining more moisture in the skin than if left exposed to air. Overnight, the product works for several hours instead of just a few minutes. Choose pure cotton, not nylon or thermal socks – these can cause sweating and make the feet uncomfortably warm. Put on the socks immediately after applying the balm and replace them with clean ones in the morning; wash them after each ritual, as balm residues attract dirt.
And how often? Divide the care into two complementary levels:
- Complete ritual – bath, filing, and balm with socks – about once a week. More frequent filing is pointless, as the skin needs time to regenerate.
- Just applying balm ideally every evening, even without socks. Consistency between rituals matters more for results than the intensity of one evening's care.
- Quick check from time to time: run your palm over the heel. As long as the fabric catches on the skin or you feel sharp edges, there's room for improvement.
Be patient. The hardened layer didn't form overnight, and it won't disappear after one evening. The first noticeable change – smoother surface and less pronounced cracks – usually appears after several weeks of regular care. If your heels remain painful or deeply cracked despite diligent care, it's advisable to consult a doctor or podiatrist; a home ritual is care, not treatment.


Category
Recommended articles

"Give a girl the right shoes and she can conquer the world!" Marilyn Monroe