

Thinning hair doesn't have to mean the end of your favorite hairstyle. Discover which lengths, parts, and colors can give your hair a fuller appearance and how to gently style and care for it at home.
How a Haircut Can Make Thinning Hair Appear Fuller
When hair starts to thin or is naturally fine, many people opt for what seems like the safest route – letting it grow and hoping that length will compensate for the lack of volume. In reality, it often works the opposite way. A well-chosen haircut can add the appearance of fullness to thinner hair without complicated morning styling. Whether you're dealing with limp ends or a visible scalp, the principle behind a fuller-looking hairstyle is surprisingly simple.
Why Thinner Hair Appears Flat. Fine hair has a smaller diameter and its own weight easily pulls it down. The longer the hair, the more the weight pulls it towards the head, preventing lift at the roots and causing the hairstyle to cling to the scalp. The result is a flat appearance, even if there's still plenty of hair on the head. Fine hair also tends to clump into thin strands, creating gaps between them.
The Role of Contrast with the Scalp. The eye perceives density mainly by how much scalp is visible between the hair. A stark contrast between hair color and skin tone – typically dark hair on light skin – turns every gap into a visible line. This is why hair of the same density can look full on one person and thin on another. While a haircut can't change this contrast, it can distribute the hair to cover the scalp more evenly and prevent gaps from appearing in the most noticeable places.
The impression of density usually breaks at two points:
- Ends – in longer hair, the ends naturally thin out as not all hairs grow to the same length and the ends split over time. Sparse, translucent ends can visually drag down the entire hairstyle, revealing that there is less hair.
- Crown – the area viewed from above, in the mirror, and in photographs. If the hair parts here, the entire hairstyle appears thinner, even if there's no lack of density on the sides.
The Same Principle Applies to Both Women and Men. Whether it's long hair, a bob, or a short men's cut, three things help achieve a fuller look: less weight, more texture, and a thoughtful line. Less weight means hair that isn't unnecessarily long or weighed down by heavy products, making it easier to lift at the roots. Texture adds movement and slight irregularity, preventing strands from falling into flat strips. A thoughtful line – the shape of the ends and the outline of the hairstyle – gives hair a defined edge that the eye reads as density.
This article focuses on appearance and daily care, not the causes of thinning. If you're concerned about rapid hair loss, it's advisable to consult a doctor. Here, we focus on what scissors in the hands of a stylist or barber and a few simple habits at home can achieve.
Length, Blunt Ends, Light Layers – The Foundation of a Fuller Cut
Whether your hair is thinning with age or naturally fine, the simple rule is: the less weight your hair has to carry, the more volume it retains. A well-chosen cut starts with the length and continues with how the stylist finishes the ends.
Women: Shorter and Medium Lengths
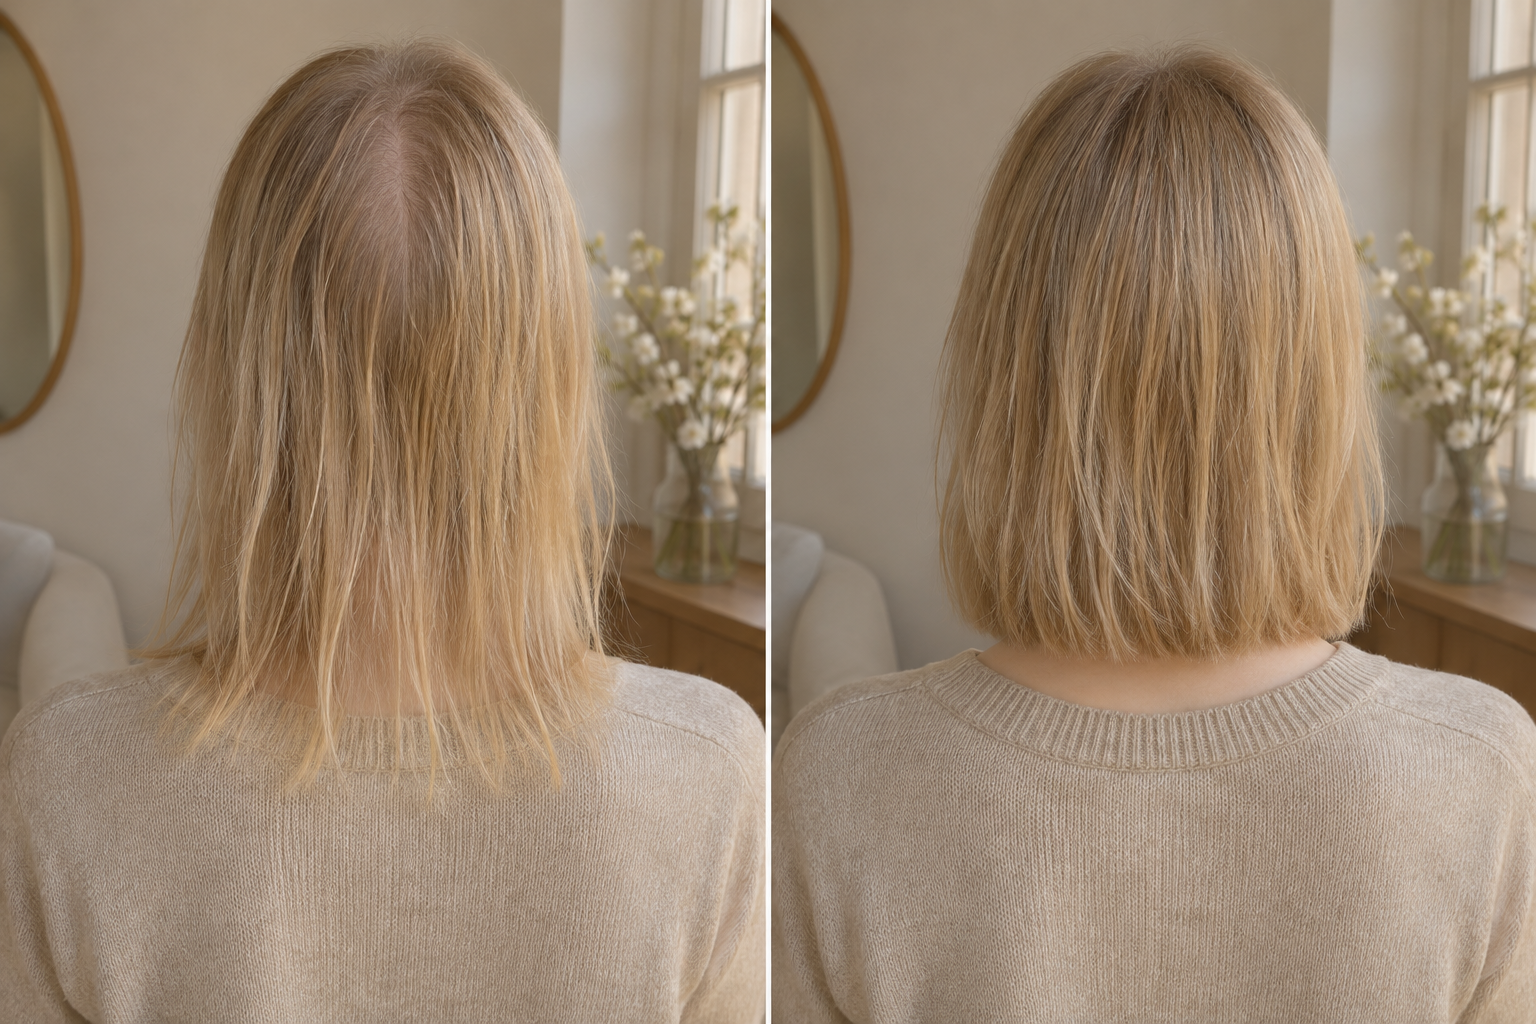
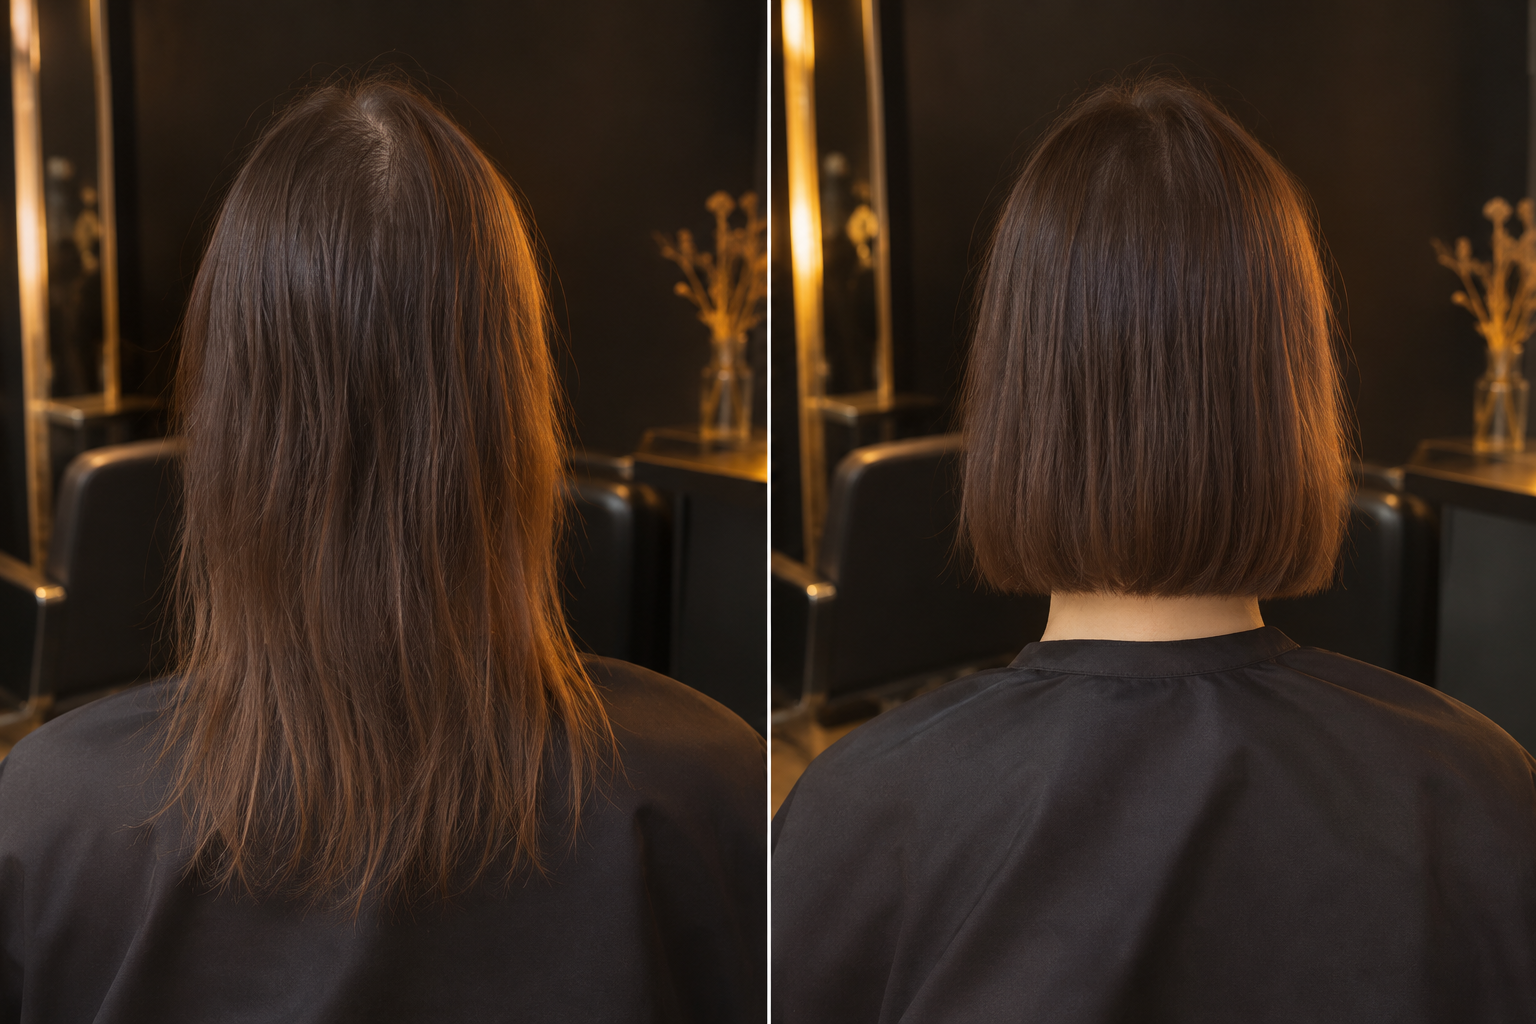
The most flattering cuts usually end somewhere between the chin and shoulders. Shorter hair is lighter, doesn't flatten as much at the roots, and the ends don't appear see-through.
- Bob – a straight or slightly angled cut at chin level. A blunt cut line creates the impression of a thick, compact edge. Stylist tip: "I'd like a chin-length bob with blunt ends, no layering."
- Lob – an extended bob ending above the shoulder. It's suitable if you don't want to completely part with length. Tip: "A shoulder-length lob, straight ends, with just a few soft layers around the face."
- Pixie – a short cut where the stylist leaves longer hair on top to be lifted with fingers. Tip: "A pixie with a longer top that can be tousled, and shorter sides."
Blunt ends mean the stylist cuts straight across the strand with scissors, not into a point or with a razor. This keeps the mass of the hair together and makes the bottom line appear fuller.
When Layers Help and What to Avoid
Soft layers around the face add movement to the hairstyle and frame the face without taking away from the rest of the hair's mass. They work best with a lob or longer bob, as long as the hair isn't significantly thin all over. On the other hand, heavy layering (thinning) and graduation throughout the length are less suitable – every removed layer takes away from the density you're trying to emphasize. Caution is also advised with long lengths: the weight of the hair pulls the style down, making the crown appear flat and the ends thin.
Men: Shorter Sides, Texture on Top
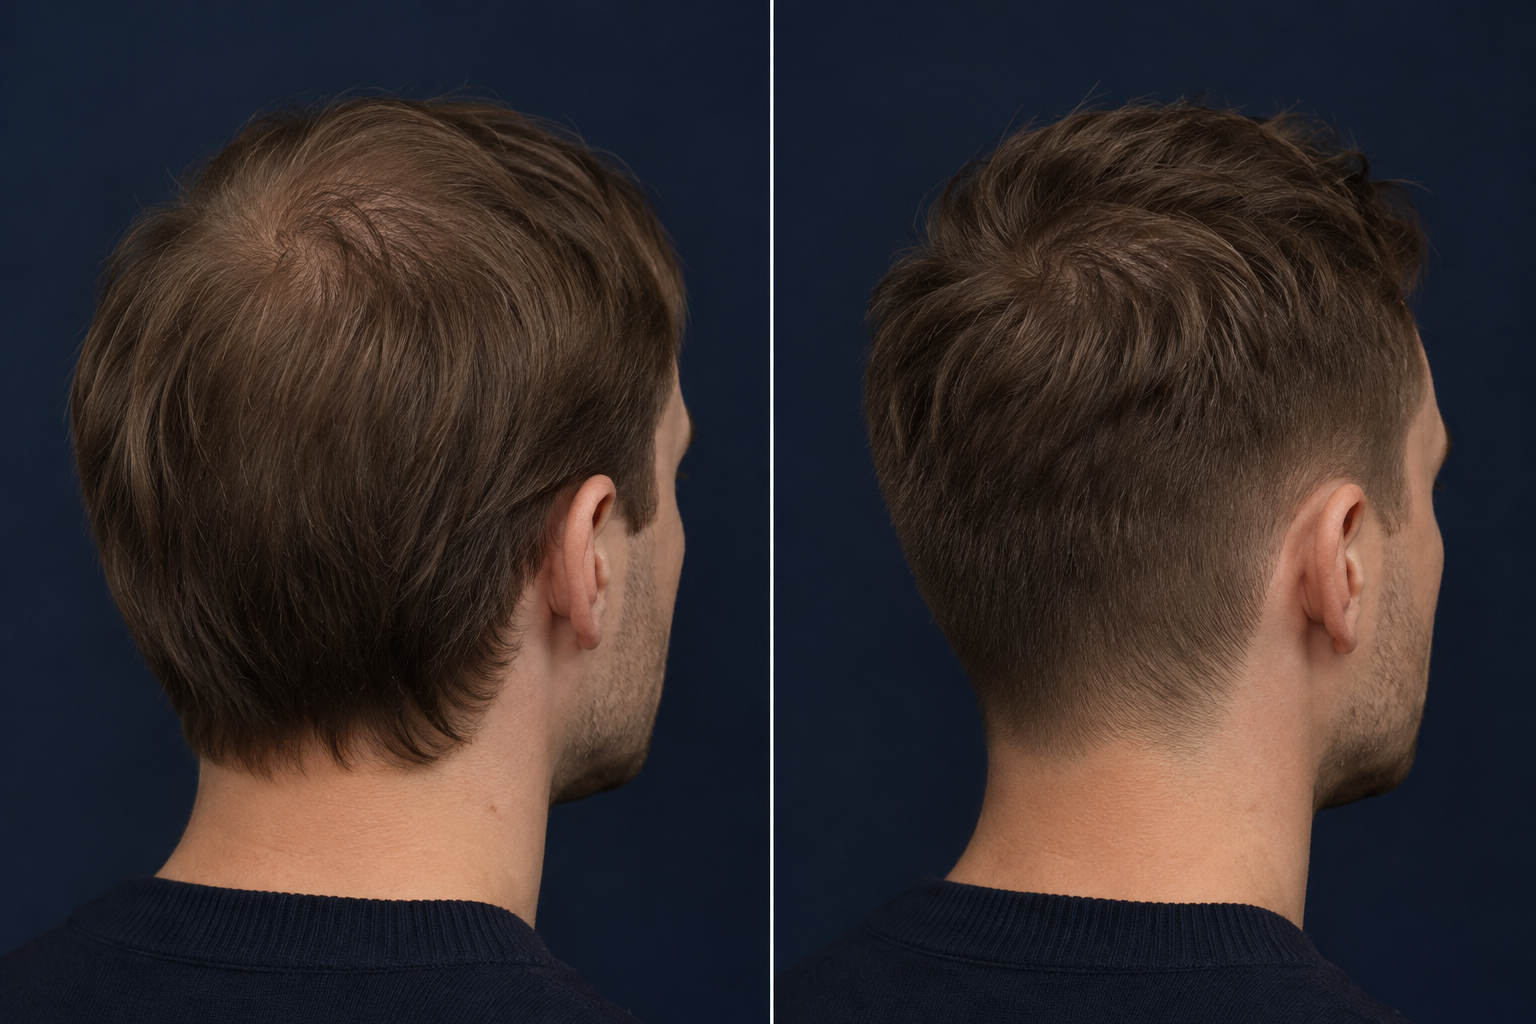
For men, the most practical approach is to reduce the contrast between thinning areas and the rest of the head. When the sides and nape are shorter, the top doesn't seem as thin in comparison.
- Short Cut with Texture on Top – the top is slightly longer, trimmed to be tousled and not lie flat against the scalp. Barber tip: "Top around three centimeters with texture, shorter sides, but without a big jump in length."
- Crop with Tousled Top – hair on the crown combed forward, often with a short straight line above the forehead to soften a receding hairline. Tip: "Crop with a textured top combed forward, short and straight at the front."
- Shorter Sides with Smooth Transition – gradual shortening without a sharp break, making the head appear balanced. Tip: "Shorter sides with a smooth transition, no sharp jump under a longer top."
Whether you're sitting at the hairdresser's or the barber's, it's worth mentioning right from the start that your hair is thinning and you want to visually thicken it. An experienced stylist will adjust the cutting technique and final length accordingly.
Parting, Fringe, Color – Small Changes That Transform the Overall Look
It's not always necessary to change the length. Often, the impression of thickness is determined by details that aren't immediately noticeable: where you part your hair, how it falls around your face, and the color at the roots. These are the small adjustments you can make at home or during your next visit to the hairdresser without having to part with the cut you're used to.
Parting is where the scalp is most visible. If you've been parting your hair on the same side for years, it tends to lie flat in that direction, and the line between them gradually widens. Try moving your parting to the opposite side – the roots will naturally lift as they are redirected against their usual direction, making the crown appear fuller. A similar effect can be achieved by shifting a few centimeters from the center: a straight parting right in the middle of the head tends to reveal thinner areas.
Even more subtle is the zigzag parting. Instead of one straight line, use the end of a comb with light teeth to part your hair, so strands from both sides interlock, and the continuous light line of the scalp disappears. It doesn't have to be sharp or regular – the looser you guide it, the more natural it looks. It's especially suitable for shoulder-length and longer hair, while for shorter cuts, simply tousle the parting with your fingers.
Fringe is another helper. A light, layered fringe or longer front strands swept to the side can cover the hairline and temples, where hair often thins first. When looking at the face, the eye primarily follows the front sections – when there's volume there, the whole looks richer. However, avoid a thick, heavy fringe cut straight across: on fine hair, it uses up too much hair, making the rest look even thinner. Men can achieve a similar effect with longer hair on top, which can be swept forward or to the side.
The second major chapter is color. Thinning hair is most revealed by the contrast between the hair color and the scalp – the smaller the difference, the less visible the thinning. Therefore, it's worth considering shades that are closer in tone to the skin: lighter warm browns, caramel, or honey tones, and for fair skin, even soft blondes. It doesn't have to be a radical change; often, lightening your current color by one or two tones is enough.
On the other hand, too dark a uniform color, typically blue-black or very dark brown, creates a sharp contrast against light skin. Every parting and every thinner spot on the crown then stands out. If you naturally have dark hair, you don't have to give it up – a bit of light and depth will help.
This is where subtle highlights and multi-tone coloring come into play. Several close shades next to each other create the illusion of depth: lighter strands appear to come forward, darker ones recede, and the head looks as if there is more hair. When booking with a hairdresser, it's worth asking for thin, scattered strands instead of wide streaks and a soft transition at the roots to avoid a stark line as it grows out.
Between salon visits, you can maintain your color with gentle toning. Toning shampoos and conditioners with pigment refresh the shade, reduce unwanted yellow or copper tones, and add shine to the hair. Simply incorporate them into your regular washing routine, perhaps once a week instead of your usual shampoo. For bleached and highlighted hair, purple variants are designed to neutralize yellow undertones. For fine hair, choose lighter products and use them sparingly to keep the hair airy.
Gentle Brushes and Combs – How to Comb Thinning Hair Without Breakage
When hair is fine and thinning, every broken or unnecessarily pulled-out hair is more noticeable than with a thick mane. A large part of this loss is not due to cutting or cosmetics, but simply combing. A hard brush, rushing in the morning, or combing wet hair with force can gradually split the lengths and thin the ends – making them appear sparse. The good news is that you have full control over this situation: all you need is the right tool and a few habits.
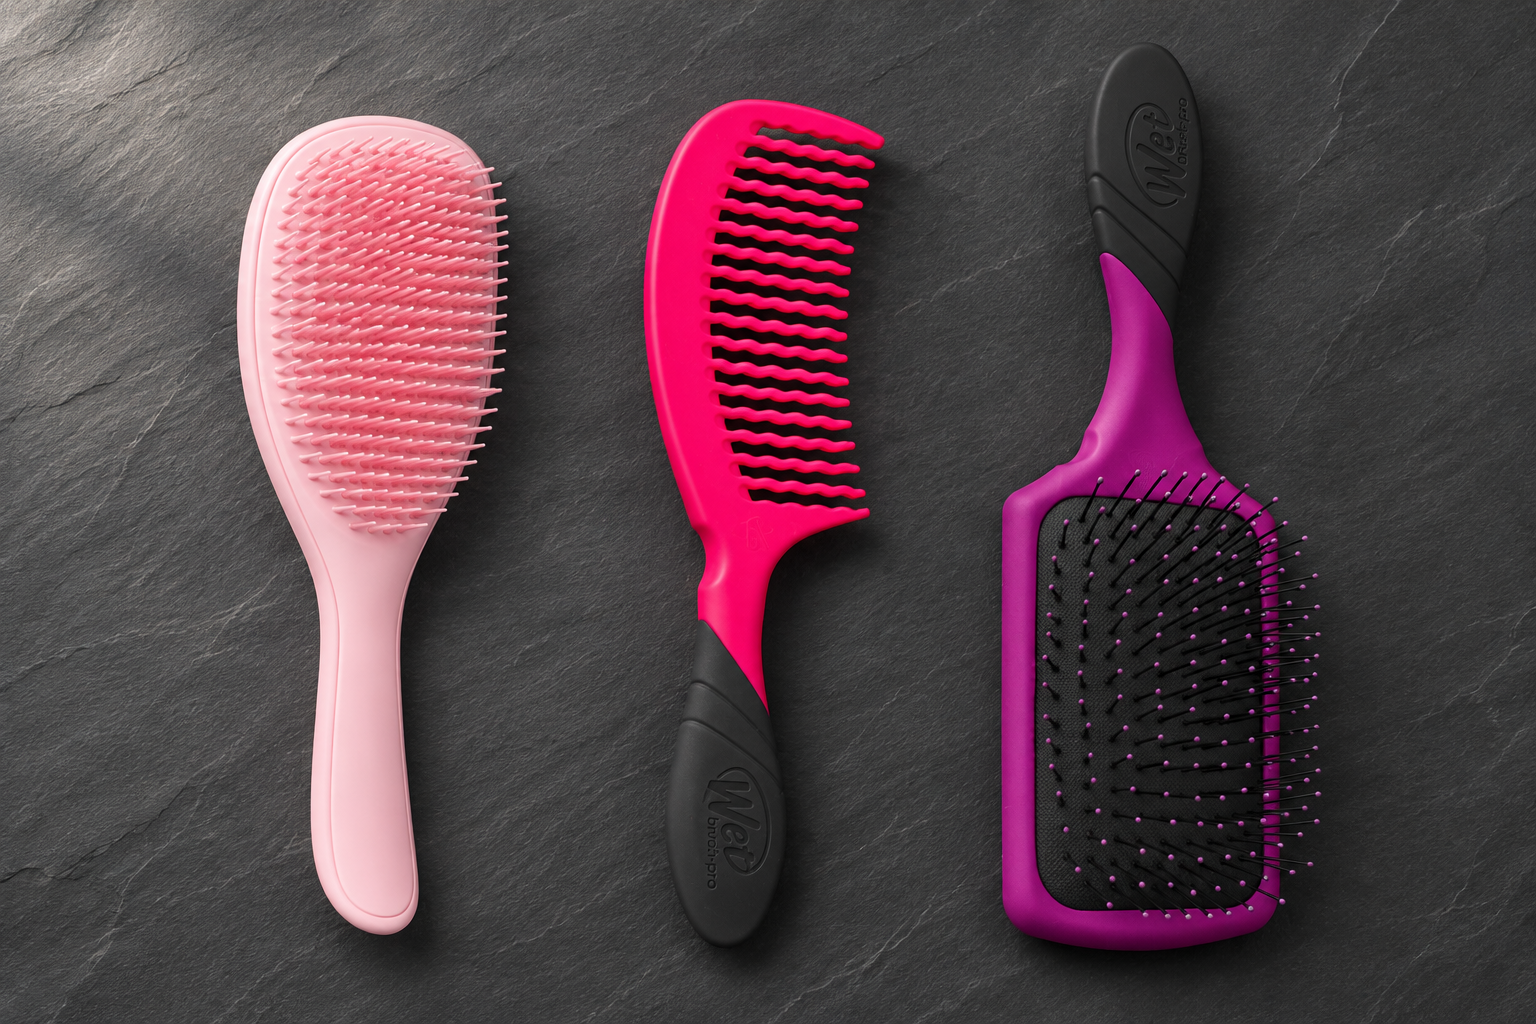
For fine hair, brushes with flexible bristles are ideal, as they bend upon contact with a knot instead of pulling on the hair. Manufacturers often label them as brushes for fine, fragile, or weakened hair, and they usually have bristles of varying lengths that gradually release tangled areas layer by layer. When choosing, it's worth considering these features:
- Soft and flexible bristles – they don't pull the hair with force but gradually release it.
- Rounded bristle tips – they are gentler on both the hair and scalp, which is especially appreciated by those with visible scalp at the crown or parting.
- A shape that fits well in the hand – allowing better control over the pull while combing.
Brushes with hard bristles or sharp tips without rounded ends should be set aside. On fine hair, they easily create static electricity and exert unnecessary force on the hair with each snag.
A wide-tooth comb is an understated but very useful tool. Strands pass through the widely spaced teeth with minimal friction, making it ideal for the first combing after washing or for distributing conditioner along the lengths. Choose a comb with smooth, well-polished teeth without sharp burrs – even a small irregularity can disrupt the hair surface with each stroke. Keep a fine-tooth comb for creating partings only.
Another category is detangling brushes for wet hair. They are designed to handle hair right after washing, often featuring an open design that quickly drains water and bristles with greater flexibility. If specifically intended for fine and fragile hair, they are usually even more pliable than regular detangling brushes.
Why do wet hair need special care? After soaking, hair absorbs water, softens, and stretches easily – thus breaking more readily under tension than when dry. Wet strands also stick together and form knots. Therefore, it's good to gently squeeze the hair with a towel after washing, rather than rubbing it, and to comb it only when it no longer drips water.
The actual detangling can then be done in several steps:
- Divide the hair into smaller sections. For longer lengths, two to four strands are enough, while short cuts can be tackled in sections around the head.
- Start at the ends. Hold the strand in your palm about halfway down its length to prevent the pull from reaching the roots, and first detangle the last few centimeters.
- Work your way up. Once the ends are smooth, move higher and continue with shorter strokes until you reach the roots.
- Slow down at knots. Instead of using force, try to loosen the knot with your fingers or a few short strokes from different angles.
- Finally, run through the entire length. Only when the brush glides freely from roots to tips is the detangling complete.
A few extra tips can help. Regularly clean your brush and comb of trapped hair and styling product residues to prevent the bristles from sticking together. Don't comb your hair unnecessarily often – for regular grooming, morning and evening are usually sufficient. And if you tie your hair back, opt for soft hair ties without metal joints that won't tear when removed.
Home Care That Won't Weigh Your Hair Down – Lightweight Products, Simple Styling
Even the best haircut loses its effect if your hair falls flat right after washing due to heavy care products. For fine and thinning hair, the simple rule is: less is more. Lighter textures, targeted application, and a few extra minutes during drying often do more for fullness than an entire shelf of products.
Lightweight shampoo and conditioner only on the lengths. When choosing a shampoo, it's worth opting for lines labeled as volumizing or for fine hair. They are usually formulated to thoroughly clean the hair without leaving a heavy residue. Focus the shampoo mainly on the scalp and roots – the foam that runs down during rinsing will clean the lengths sufficiently. Conditioner, on the other hand, doesn't belong at the roots. Apply it from mid-length to the ends, leave it on briefly, and rinse thoroughly. If you feel that even a light conditioner weighs your hair down, try a leave-in spray that you can gently mist onto the ends. Use nourishing masks and oils sparingly, perhaps once a week, and again only on the lengths.
Volumizing mousses and sprays at the roots. Volumizing styling products work best on damp hair. After washing, gently squeeze your hair with a towel – don't rub it, as wet strands are more fragile. Then part your hair into sections and apply mousse or spray directly to the roots, not the lengths. Start with a small amount; you can always add more, while excess will clump the hair and reverse the effect.
- When air-drying, occasionally lift the hair at the roots with your fingers to prevent it from lying flat against the head.
- Let it dry for a while in the opposite direction to how you usually wear it – once returned to its usual position, the hairstyle will appear higher.
- It also helps to dry with your head tilted down, gently fluffing the hair with your fingers.
Regular trimming of the ends is more important for thinning hair than it might seem. Split and weakened ends make the lengths appear transparent, making the entire hairstyle look thinner. Trimming about every six to eight weeks keeps the ends blunt and maintains the shape of the cut you and your stylist chose. In the meantime, be gentle with the ends – don't overburden them with tight hair ties and avoid tying them tightly at night.
Simple everyday styling doesn't have to take more than a few minutes. For short hair – both women's and men's – just rub a small amount of lightweight paste or texturizing spray between your palms and lift and tousle the hair at the roots with your fingers. Matte textures usually look more natural on fine hair than shiny gels, which can clump hair into strands. For longer hair, a loose braid plaited into slightly damp hair overnight works well – in the morning, you'll have soft waves without any heat styling. Finally, you can spray a light hairspray at the roots from a distance to hold the shape while keeping the hair flexible.
If you want to create your home routine, our range of hair care products includes volumizing styling sprays for the roots, such as Schwarzkopf Professional Osis+ Volume Up or Kevin Murphy Anti.Gravity.Spray, and lightweight leave-in treatments that add softness to the ends without weighing down the lengths. Choose according to your hair length and how much time you want to spend on styling in the morning – even a simple routine with two to three products can help make your haircut look fuller and more polished.
Category
Recommended articles

"Give a girl the right shoes and she can conquer the world!" Marilyn Monroe
