

Highlights, Balayage, or Babylights: Why These Techniques Are Often Confused
You've seen it: the salon price list features four or five different names, social media adds even more, and at first glance, the photos under them look very similar. Lighter strands, illuminated lengths, darker roots. Yet, the price difference can be significant, and the difference in how often you'll return to the chair is even greater. It's not marketing jargon invented by salons to stand out – these terms actually refer to different techniques. It's just hard to decipher what they mean.
The confusion has a simple reason. All the mentioned techniques aim for the same goal, which is to lighten part of the hair, using very similar products. The name doesn't describe the color or shade, but rather the method by which the lightening mixture is applied to the hair. Highlights, babylights, balayage, and airtouch differ in application technique, not in the resulting blonde. The same shade can be achieved in several ways, and conversely, one technique can look different each time depending on how dark the starting base is.
The second difference becomes apparent after a few weeks: how high the lightening starts at the roots. Some techniques work from the roots, while others start a few centimeters down. This determines whether you'll see a distinct line in the transition after two months or a soft blend that grows out subtly. This also affects when you'll book your next appointment.
To help you navigate the options, we'll compare the techniques based on three axes. If you remember them, you'll understand the essence of each technique even if you encounter it under a different trade name:
- Application – does the stylist separate individual strands and wrap them in foil or thermal paper, or do they paint the mixture directly onto the hair freehand?
- Resulting Transition – is the boundary between the original color and the lightening regular and contrasting, or smooth and blurred?
- Maintenance Difficulty – how often do you return to the salon, and how much time and care does the result require at home?
These three axes are more interconnected than they seem. The more precise and regular the application, the sharper the regrowth tends to be, and the shorter the intervals between visits. Conversely, techniques that work softly and with a deliberately undefined boundary last longer but don't give you precise control over where exactly the light strands will be.
Before we dive into the individual techniques, it's worth understanding what the lightening mixture actually does to the hair – without this, the differences in subsequent care are hard to grasp. With the framework of the three axes, you can go to the salon and ask specifically. Instead of "I want highlights," try describing what you expect from the result: whether you want a striking contrast or more of a sun-kissed look, how often you're willing to return, and how much care you can manage at home. A good stylist will suggest a technique based on that – and you'll understand why they chose it.
What Happens to Hair During Lightening
No matter which technique you choose, the chemical process occurring in the hair is essentially the same. The difference lies in where and how the lightening mixture is applied – the actual reaction inside the hair is common to all methods. Understanding what happens during this process helps you grasp why each technique requires slightly different aftercare.
You can imagine hair as a rope covered with scales. The outer layer, the cuticle, forms a protective shell that seals the hair and gives it shine. Inside, in the cortex, resides the natural pigment melanin – which determines whether your hair is black, brown, or dark blonde. The lightening mixture, a combination of bleach and hydrogen peroxide, shifts the pH to alkaline levels, lifting the cuticle scales and allowing the mixture to penetrate the cortex, where it breaks down some of the pigment. The pigment is not washed out but chemically broken down – it cannot be restored, only replaced with artificial pigment through toning or coloring.
However, lightening also reduces some of the hair's strength. The cuticle becomes more porous and less adherent, making it harder for the hair to retain moisture, reflect light evenly, and it tangles more easily. Additionally, some of the internal bonds that hold the hair structure together are disrupted, making the hair more prone to breakage and split ends. The dryness you feel after lightening often results not from a lack of moisture but from a damaged surface that cannot retain water.
Another typical side effect is warm undertones. Natural pigment is not uniform: dark, brown-black components break down faster than red-yellow ones. Therefore, during lightening, the hair goes through a range of shades – from dark through red and orange to yellow and light yellow. Where the process stops, the undertone remains. In darker hair, it stops sooner, resulting in more orange tones, while in lighter hair, it tends to be more yellow. In the salon, this undertone is usually neutralized with toning, which adds cooler pigment to the hair and suppresses the visible warmth of the color. However, the toning pigment gradually washes out, so warm tones return over time.
Due to the weakening of the internal structure, strengthening additives, known as bonders, are commonly added to the lightening mixture today. They are mixed directly into the mixture or applied immediately afterward to support the bonds in the hair when they are most vulnerable. They do not reverse the chemistry of lightening or restore damaged hair to its original state, but they help keep the hair more cohesive.
The extent of the impact lightening has on hair varies from case to case. It primarily depends on:
- how many shades you are lightening – lightening by two shades is different from going from dark brown to platinum, where the mixture must work longer and more intensively;
- how close to the roots you are working – the heat from the scalp accelerates the reaction, so it occurs faster at the roots than in the lengths and requires more precise timing;
- the condition of the hair – uncolored hair tolerates lightening better than hair that has already been dyed, permed, or previously lightened;
- whether the same strand is lightened repeatedly – overlapping already lightened areas is a common cause of damage, which is why some techniques focus only on regrowth or new strands.
This framework explains most of the differences you will see between individual methods. The higher the level of lightening you choose, the closer to the roots you work, and the more frequently the hair is treated, the more demanding the aftercare and the salon visit intervals will be.
Classic Highlights and Baby Lights: Precision Under Foil
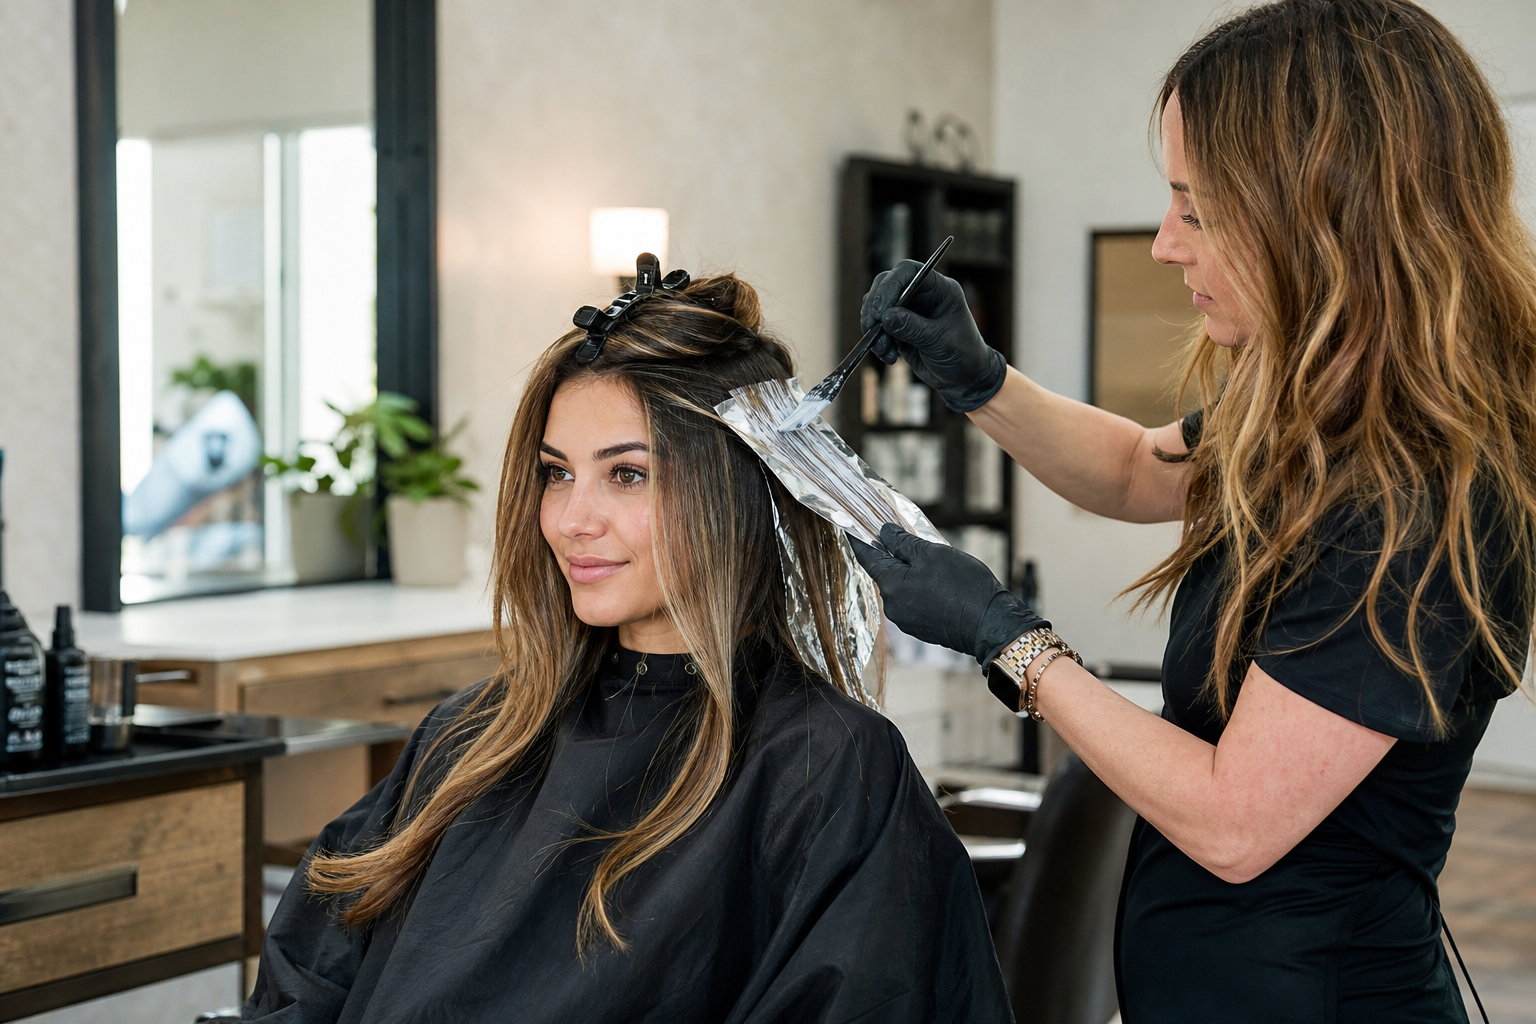
Highlights and baby lights share the same principle. The hairdresser works section by section, separating individual strands with a comb and wrapping each one in foil or thermal paper. The wrap serves two purposes – it isolates the lightening mixture from the surrounding hair, which should remain in its original shade, and it retains heat, allowing the reaction to proceed faster and more evenly. This precision allows work close to the roots, ensuring a predictable result.
Classic Highlights: Regular Pattern, Bold Contrast
With classic highlights, relatively thick strands are used, usually measured in millimeters, and are separated in a regular pattern across the entire head. The lightening mixture is applied from roots to ends, so the color difference is visible along the entire length. The result is graphic and clear: there is a distinct boundary between lightened and unlightened strands, and the highlights are noticeable even on darker hair.
The final intensity is mainly influenced by the number of foils and the width of the strand. Fewer foils with thicker strands create bold, contrasting highlights; a denser arrangement of thinner strands softens the overall impression and lightens the hair more uniformly. If your main goal is optical volume, highlights can also be combined with strands in a darker shade.
Baby Lights: Fine Strands, Soft Illumination
Baby lights operate on the same basis, but the key difference is in the width of the strand. Only a very thin layer of hair goes into the foil – sometimes literally just a few strands. The lightened hair blends with the surrounding hair, creating no sharp boundary, and the overall effect resembles natural illumination, like the lightening that occurs after a summer spent in the sun. This is where the technique gets its name: it mimics the fine light strands often seen in young children.
However, this softness comes at the cost of time. To achieve the effect across the entire head, a hairdresser needs significantly more foils than with regular highlights, and the application process takes noticeably longer – with longer and thicker hair, it can easily take several hours in the chair. This usually increases the cost of the service as well. Baby lights are also not a technique for drastic color changes: on a dark base, the fine strands may almost disappear, so they are often combined with another technique or built up gradually.
In summary, the two techniques differ in four main points:
- Strand Width – thicker strands in a regular pattern for highlights, very fine strands for baby lights.
- Final Impression – highlights are bold and distinct, baby lights are soft and blended.
- Time in the Chair – highlights can be done in a shorter session, baby lights require significantly longer application.
- Suitable Base – highlights can work on dark hair, baby lights are more effective on a lighter base.
Regrowth: Shorter Intervals Between Visits
Both techniques share one common feature that determines maintenance: the lightening starts at the roots. As the hair grows, a band of the original color appears at the roots, visible as a horizontal line. This is more noticeable with highlights due to the greater contrast; with baby lights, the line is softer, but it doesn't disappear completely. In practice, this usually means a salon visit about every two to three months, depending on the speed of hair growth and the intensity of the lightening.
During touch-ups, the focus is mainly on the root area to avoid over-processing the already lightened lengths. The lightening mixture affects the hair structure each time, and the more frequently the same area is treated, the more prone it is to breakage. If you know you won't be able to visit the salon more than twice a year, it's worth discussing techniques with your hairdresser where the lightening doesn't start directly at the roots.
Balayage and Airtouch: Freehand Technique and Soft Transition
While foil work relies on precisely separated strands, the second group of techniques uses foil only marginally, or not at all. The lightening mixture is applied freehand, starting at a certain distance from the roots—sometimes at eye level, other times only from the ears down. This single difference changes the entire result: instead of regularly repeating light strands, there is a smooth transition from darker roots to lighter lengths.
Balayage comes from the French word for sweeping, and the technique itself is similar. The stylist applies the mixture with a brush directly onto the surface of the strand, very lightly at the roots and increasingly saturated towards the ends. The strand is not wrapped in foil, so the mixture does not soak through its entire width—mainly the top layer, which is visible during regular wear, is lightened. Some stylists do place foil or paper under the strand after application to prevent the mixture from touching the rest of the hair; however, this does not share the same application method as traditional highlights, it's merely to protect the surrounding hair. The result looks as if the hair has naturally faded in the sun, and the boundary between your color and the lightening is not a sharp line but a soft band several centimeters long.
Airtouch achieves a soft transition in a different way, using a hairdryer. The stylist separates a strand, lifts it, and blows out the shorter and finer hairs with a stream of air—those that are still growing. Only part of the original strand remains in hand, and it is on this part that the mixture is applied. Thus, only some hairs are lightened, blending with the unlightened ones, and the transition appears even softer than with balayage. The trade-off is time: blowing out and applying strand by strand means a noticeably longer session in the chair and usually a higher price than simpler highlights.
Freehand techniques are usually suitable for those who:
- have naturally darker hair and want to lighten it without going up many shades;
- do not want to deal with regrowth every few weeks and are looking for a color that can be worn longer;
- wear their hair at least shoulder-length, as the transition needs length to develop;
- want to accentuate a haircut or brighten areas around the face without changing the overall color.
Regrowth is precisely why these techniques are associated with longer intervals between salon visits. When lightening starts several centimeters from the head, there is no visible line at the boundary, and the light parts move down as the hair grows. Therefore, visits to the salon are often every three to four months, while techniques starting from the roots require touch-ups much sooner. However, this does not mean that nothing happens in the meantime—the lightened lengths gradually change tone to warmer shades, and the stylist usually just retouches them during the next visit without needing to lighten again.
How to Choose Based on Hair Length, Time, and Home Care
Once you know how each technique is applied, the practical decision remains – which one makes sense for your hair. The answer consists of three things: your current length, the time you want to spend visiting the salon, and the routine you can realistically maintain at home.
Hair Length: How Much Room for Transition
A soft transition needs length. For the darker roots to blend smoothly into lighter ends, there must be enough space for a gradual shift, which on a short cut can be just a few centimeters. That's why the same technique looks completely different on a bob compared to hair that falls below the shoulders.
- Short Cut to the Chin or Shorter – There's little room for maneuver, the transition is shortened, and it can easily become more of a break than a blend. Working with thin strands usually looks clearer here, brightening the facial area and ends.
- Shoulder-Length Hair – The transition zone is long enough to play with, but the result tends to be more contrasting.
- Length Below the Shoulders – The most room for smooth blending of shades. On this length, freehand techniques stand out because the light has a path to flow from mid-lengths to the ends.
Time in the Salon vs. Time Between Visits
Here, it's good to consider two different times, which usually oppose each other. Techniques with very thin strands and airtouch require longer sessions, as separating and preparing the strands takes time. However, the regrowth doesn't end with a sharp line, so the interval between visits is usually longer.
Conversely, lightening that starts close to the roots is applied more quickly, but regrowth is visible sooner, and correction needs to be planned more regularly. Your stylist will always best determine specific intervals based on how fast your hair grows and the difference between your natural color and the target shade. If you know you'll only be able to visit the salon a few times a year, it's wise to mention this at the start of the consultation.
Home Care: What Lightened Hair Demands Extra
Lightened hair requires a different routine than uncolored hair. The impact on the structure affects both the shade and how the hair behaves during combing and blow-drying. Home care typically consists of three layers.
- Shampoo and Mask with Purple Pigment – They work against yellow tones that appear in light lengths over time. They're usually used occasionally, not with every wash, to prevent the shade from cooling more than desired.
- Nourishing Mask or Oil for the Ends – They restore suppleness to the lengths and make combing easier. The mask is applied after washing to the lengths and ends, and the oil is used sparingly to avoid weighing the hair down.
- Heat Protection – Essential before every blow-dry or straightening. It's an easy habit that helps maintain the salon results for longer.
When you consider these three perspectives together, the decision becomes much simpler. Shorter hair and a desire for regular salon visits lead to more precise foil techniques, while longer hair and the aim for longer intervals lean towards freehand painting. Home care is similar for both options, differing mainly in how often you'll need to tone down warm tones at the roots.
At Brasty, you'll find entire professional ranges for this care, so you don't have to assemble a routine from four different stores. Shampoos and masks for cool blonde shades, nourishing masks, oils for the ends, and heat protection products are covered by brands like Wella Professionals, Schwarzkopf Professional, Kemon, and L'Oréal Professionnel. It's worth choosing based on what your hair needs most – keeping the color in shade or nourishing the lengths.
Category
Recommended articles
"Give a girl the right shoes and she can conquer the world!" Marilyn Monroe