

Smudgy Eyeliner: A Soft Outline That Forgives Mistakes
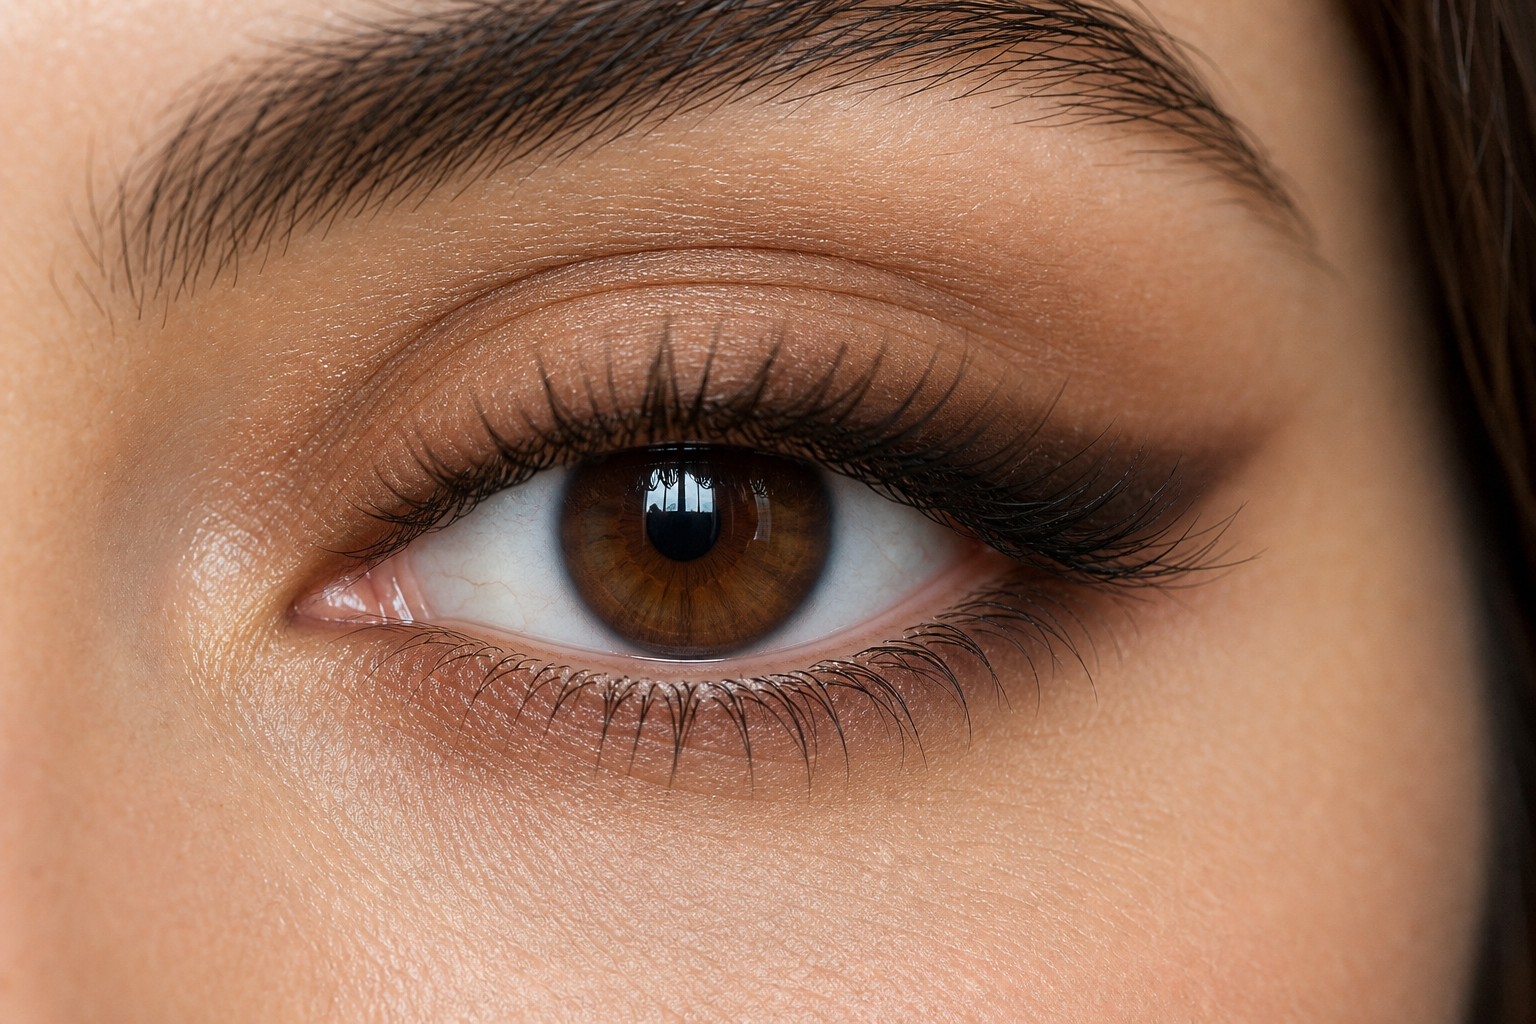
A sharp graphic line is a discipline for a steady hand, good lighting, and a calm morning. The smudgy eyeliner works in the exact opposite way: instead of a clear boundary, it creates a soft, slightly blurred outline that gradually fades from the lash roots. It's a forgiving technique even for those who don't dare to perfect the stroke – a small inaccuracy here is not a mistake but an integral part of the result. If your line wavers or comes out thicker on one eye than the other, you can even it out by smudging instead of wiping everything off and starting over.
Terms around eyeliners are often interchanged in everyday speech, yet they refer to three different things with distinct outcomes:
- Smudgy Eyeliner – a creamy pencil applied close to the lash roots and immediately smudged into a soft shadow. The result is smoky, optically thicker, and looks more like a shadow than a line.
- Classic Thin Eyeliner – a precise stroke on the upper lid with a sharp edge, usually done with liquid or felt-tip liner. It requires confidence because once it dries, it can't be reshaped, only removed and redone.
- Kajal on the Waterline – a soft pencil applied directly to the waterline between the lash roots. It deepens the gaze and optically reduces the visible whites of the eyes, but it doesn't create an outline around the eye by itself.
These three approaches are not mutually exclusive. A smudgy line on the upper lid pairs well with kajal on the lower waterline, together creating that typically soft, slightly sleepy look that the smudgy technique aims for. The difference is that each layer serves a different purpose: one adds volume and shadow, the other thickens the lash line.
So when should you reach for a pencil and when for a liquid liner? Decide based on whether you want an edge or a transition. Liquid liner dries quickly, holds its shape, and is suitable for winged corners and graphic lines – but it can't be smudged. A pencil, on the other hand, gives you time. The application remains malleable for a while, allowing you to sketch the line, step back from the mirror, check symmetry, and then refine it. For a smudgy line, this delay is crucial, which is why liquid liner isn't suitable for smudging, even as a makeshift substitute.
The entire technique relies on texture. You need a pencil that is creamy enough to glide over the lid without pressure, can be smudged with a brush or finger for a while – and only then sets in place, where it stops moving. A pencil that's too hard scratches the lid, doesn't leave enough pigment, and offers little to smudge. Conversely, a pencil that's too greasy glides beautifully but never sets properly and slides under the eye throughout the day. The balance between these extremes is precisely what distinguishes a pencil suitable for a smudgy line from the others.
The good news is that you have plenty to choose from. In the Eye Pencils and Eyeliners category on Brasty, you'll find about three and a half hundred items across all price ranges – from affordable kajals that cost less than a hundred to premium and luxury brand pencils. The difference between them isn't just in price, but mainly in how long the application remains malleable and how firmly it sets. A good guide is the texture description: look for terms like creamy, soft, or kajal, rather than long-lasting and quick-drying.
The Base for Eyeliner: Why Smudging Starts Before the Pencil
When a smudged line shifts under the lower lashes within a few hours, the first reaction is often to blame the pencil. However, in most cases, the issue begins earlier—right on the eyelid. The mobile eyelid is one of the most active areas of the face: you blink almost constantly, the skin folds and stretches, and oil from around the eyes naturally moves towards the lash line. Pigment that lies on bare skin has nothing to cling to, so it moves along with it.
A smudgy line exacerbates this situation. A deliberately blurred edge means that the pigment lies in a very thin layer and is spread beyond the lash line itself—right where blinking and facial expressions affect it the most. This makes what you do with the eyelid before reaching for the pencil even more important.
Primer Unifies the Surface
The first step is a clean and dry eyelid without any cream residue. If you use eye cream, give it a few minutes to absorb—a greasy film under the pigment acts as a slippery layer, causing the line to slide right off. Only then should you apply a primer, a product that creates a uniform surface on the eyelid. It smooths out minor lines, evens out the skin texture, and provides a surface for the pigment to adhere to.
For this purpose, Dermacol Satin Make-up Base from the Primer category is suitable. Apply it sparingly: a rice-sized drop for both eyelids is more than enough, spread with your fingertip from the inner corner outwards. A thick layer of primer paradoxically harms—remaining damp, it causes the pencil to sink in instead of gliding over. Wait half a minute before continuing, until the surface mattifies.
Matte Shadow as Insurance and Guide
The second layer of preparation is subtle but always recommended for a smudgy line: a matte eyeshadow in the same or a slightly darker shade than the pencil. It serves two purposes. The powder texture mattifies the base and absorbs excess moisture, preventing the line from bleeding. At the same time, it leaves a light trace on the eyelid where the line will lie—giving you a pre-drawn shape before making the first pencil stroke, so you don't have to find it blindly.
You might reach for the Maybelline The Nudes Eyeshadow Palette, which offers a range of neutral beige, taupe, and brown tones. You can choose a matte counterpart for both brown and black pencils, and use the rest of the shades for subtle brightening of the inner corner. Apply the shadow with a small flat brush precisely along the lashes, not over the entire eyelid—it's about a thin strip, not a full eye makeup.
Oily and Mature Eyelids Require a Different Approach
Not every eye needs the same preparation. Two situations are worth extra attention:
- Oily eyelid. If your makeup creases on the eyelid by morning, add a thin layer of translucent powder after the primer and only then apply the matte shadow. This creates a dry base that keeps the pigment in place. Avoid creamy and satin shadows with shine—they will cause smudging.
- Mature eyelid with a drooping crease. Here, the issue is not oil but mechanics: the skin folds when the eye is open, transferring pigment to the upper part of the lid. It helps to draw the line lower and narrower, right between the lashes, and focus preparation on the edge of the lid rather than the entire surface. Apply primer and shadow only where you can see with normally open eyes.
The entire preparation takes less than a minute and saves you repeated touch-ups throughout the day. Without it, you'll be battling your eyelids from morning till night; with it, a few strokes in the morning and at most a minor correction before evening will suffice.
Step by Step: Apply, Blend, Check
The success of a smudgy eyeliner depends on timing. The creamy texture remains pliable for only a short while; once it dries, blending it without ruining the line becomes impossible. Therefore, divide your work into three phases – application, blending, and checking – and allow roughly a minute per eye. To find out how much time your pencil gives you, test it on the back of your hand: draw a line, count to twenty, and try to smudge it.
Application: Short Strokes Just Above the Lashes
Forget about drawing one long line across the entire lid – with a smudgy eyeliner, no one would see it anyway. Rest your elbow on a table to steady your hand, gently stretch the lid with a finger at the outer corner, and draw short, millimeter-long strokes from the inner third of the eye outward. Hold the tip as close to the lash roots as possible and fill in the gaps between them – otherwise, they will show through as light spots, making the line look disconnected. If you're unsure of your hand, place the pencil on the lid in a series of dots and then connect them.
Choose the thickness of the line according to the shape of your eye. A smaller or more deep-set eye can handle a thinner line along the lash line – a thick band will visually close the lid. Conversely, a more prominent, open eye can take a wider line slightly lifted towards the outer corner. Always draw the lower lid line more delicately than the upper, ideally just along the outer two-thirds.
Kajal on the inner line, that is, on the mucosal edge between the lashes and the eye, is a separate discipline. Gently pull the lower lid down, look up, and guide the soft tip along the edge with short touches, not pressure. Expect that the line will partially transfer to the lower lid during the day – with a smudgy eyeliner, this can actually be beneficial. If you have sensitive eyes or wear contact lenses, it's better to skip the inner line.
Blending: Smudger, Brush, or Finger
This is where you decide whether you'll have a soft shadow or a smudge. Each of the three tools gives a different result:
- Smudger – a short, dense tip often found on the opposite end of the pencil. It works in small areas, perfect for refining the line just above the lashes and softening sharp ends. There's the least risk of spreading the shadow higher than desired.
- Brush – a small angled or dome-shaped eye brush offers the most precise control of shape, as it blends in thin layers. It's worth using for daytime makeup, where the shadow should remain narrow.
- Finger – the quickest option and also the least precise. The warmth of the finger softens the texture, the line spreads and softens, but it can easily go further than planned. It's suitable for an evening look, intentionally smudged.
Whatever you choose, blend with short movements from the lashes upwards and outwards, never back and forth. Always work on one eye at a time – if you draw both lines at once, the second one will dry in the meantime.
Check: Both Eyes Side by Side
The final step is often skipped. Step back from the mirror to arm's length, open your eyes to a normal gaze, and compare both sides at once – you can't judge symmetry up close with one eye closed. Check three things: where the line ends at the outer corner, how high the shadow reaches above the lashes, and whether it's equally intense on both eyes. Correct minor differences by tapping dark eyeshadow on the lighter side, not by adding another layer of pencil – that would sharpen the shape again.
It's worth having at least one small eye brush on hand for blending. In the Makeup Brushes category, you'll find affordable sets that cover the entire process at once – the five-piece Real Techniques Everyday Essentials combines face brushes with an eye brush. Wipe the fibers with a tissue after each use; dried creamy texture blends significantly worse.
Six Eyeliners and Kajals from Six Brands Available at Brasty
Creamy pencils are not just one category. There are differences between each stroke that you'll notice right from the first application – one blends almost by itself, while another holds its shape and lets you fine-tune the line slowly. We've selected six eyeliners and kajals from six different brands in the eyeliner and eye pencil category. For each, we'll mention three things that matter most when using the smudgy technique: how hard the stroke is, how long it remains blendable, and who it usually suits.
- Dermacol Waterproof Micro Eyeliner – thin tip and firmer, waterproof stroke. The window for blending is shorter here, so it's worth working in short sections and not drawing the entire lid at once. It's suitable when you want just a subtle blur right at the lash roots and need the line to withstand heat and humidity.
- Maybelline Quick Shaper – thin stroke with a firmer tip that draws precisely. That's why it's good to apply a bit more material before you start blending; a narrow line blurs quickly and may disappear before you achieve the desired shape. Suitable for those who want to suggest a smudgy effect rather than develop it into a wide smudge.
- Clarins Crayon Khôl Eye Pencil – classic kajal with a soft, pliable stroke. It applies to the lid without pressure and blends comfortably, whether you use a brush or your finger. Ideal for those with more sensitive eyes who don't want to scratch the lid with a hard tip.
- Artdeco Kajal Liner – intense kajal that can handle the inner line. The stroke is soft and remains blendable for noticeably longer, giving you time to gradually refine the outline. A good choice for beginners: as long as the material hasn't dried, you can still adjust the shape.
- Pupa Multiplay Eye Pencil – a more versatile pencil with which you can draw a line or shade the entire lid. The stroke is creamy but not slippery, so it's easy to control and doesn't spread into an undefined smudge. Suitable when you want to achieve both outline and subtle shading with one pencil.
- Lancôme Le Crayon Khôl – a higher-end kajal with a smooth stroke that offers minimal resistance. It remains blendable for longer, which is appreciated by anyone who works more slowly or wants to layer the smudge. Suitable for advanced users and those who want a richer base under eyeshadow.
We deliberately kept the shades in a brown and coal-black kajal palette. Brown is more forgiving – when blended, it acts more like a soft shadow, and small inaccuracies disappear, making it a sensible start if you're just trying out a smudgy line. Coal-black provides more contrast and works better for evening, but it requires more careful blending: any residue outside the intended shape is immediately noticeable.
When choosing, also consider how your skin behaves. On oilier lids, soft creamy strokes move faster, so a pencil with a firmer tip or a waterproof formula usually works better. Dry and sensitive skin, on the other hand, will appreciate a smooth kajal that applies without pressure. If you're unsure, start with a brown kajal with a medium-soft stroke – it forgives the most mistakes and helps you learn to gauge how long a blending window suits you best.
Setting and Longevity: Ensuring Your Eyeliner Lasts Until Evening
Smudged eyeliner looks great until the first smudge ends up where it shouldn't be – in the crease of your eyelid or under your lower lashes. The smudgy technique intentionally uses a soft, unfinished texture, which remains sensitive to oil, heat, and regular eye movement. Setting it takes less than a minute and determines whether your eyeliner lasts two hours or the entire workday and evening afterward.
Powder While the Liner is Still Soft
Once you've finished smudging, reach for a matte powder. Pick up just a small amount on a small angled brush and gently press the powder onto the liner – don't drag or rub, or you'll disturb the smudged outline. The powder mattifies the oily component of the pencil, preventing it from moving, while softly rounding the edge of the smudge, which is exactly the effect you want with a smudgy liner.
For oilier eyelids, a mattifying powder that can handle excess sebum beyond the eye area is sensible. From Brasty's selection, Dermacol ACNEcover Mattifying Powder is suitable for this purpose – a fine loose texture that you can apply in a thin layer over the entire eyelid and under the lower lashes. If your eyelids are on the drier side, a regular transparent powder in a smaller amount will suffice.
Finish Your Makeup with a Setting Spray
Powder holds the liner, and setting spray holds the entire makeup together. From the Fixers category, the long-standing favorite is Maybelline Lasting Fix Make-Up Setting Spray 100 ml – a universal choice that sets makeup, powder, and the eye area all at once.
- Hold the bottle about 20 centimeters from your face, no closer – otherwise, droplets form that can ruin your makeup.
- Apply in two to three short bursts in an X and T shape, with your eyes closed.
- Let the spray dry naturally. Don't wave your hand or blot your face with a tissue, as this will disrupt the setting film.
- Use the spray only at the very end, never between individual layers of eye products.
When to Choose a Waterproof Option
A waterproof pencil isn't necessary for every day, but there are situations where it's worth it: long summer heat, an all-day wedding, a plane journey, or simply eyes that tear easily. Keep in mind that waterproof formulations set faster – you have about twenty to thirty seconds to smudge them before they become unshapable. Therefore, work in shorter sections: apply a bit of liner, smudge it immediately, then continue.
Removing it requires a bit of care. Use a two-phase eye makeup remover, place a moistened pad on the closed eyelid, and let it sit for a few seconds to release the pigment on its own. Only then wipe the pad away in one motion outward. Scrubbing irritates the skin around the eyes unnecessarily and speeds up nothing.
The Minimal Kit You Need
You don't need a whole drawer of products. For a smudgy liner that lasts until evening, you only need three things: one soft pencil or kajal in your chosen shade, an eyeshadow primer, and setting products in the form of matte powder and spray. All three categories – Eyeliners and Pencils, Primers, and Fixers – can be found together in Brasty's decorative cosmetics catalog, so you can assemble your kit in one purchase.
Once you master the technique, gradually add: a second pencil shade for a more intense evening look, a higher-quality brush for smudging, or a waterproof pencil as a backup. The basics remain the same – a soft pencil, a clean base, and diligent setting.
Category
Recommended articles
"Give a girl the right shoes and she can conquer the world!" Marilyn Monroe